
Firmware versions:
- 2.21.XXX (some of the features described in this guide may not be available on this firmware)
- 3.9.XXX
- 4.X.XXX
You can set up your DZMx to send scheduled tracking, flight events, emergency messages and other positional information to your tracking provider. This guide walks you through the basic menus and setup to get your DZMx tracking in the manner you wish.
This document is a comprehensive step-by-step process of configuring the tracking and advanced tracking features of your Flightcell DZMx. You require:
- An installed and powered Flightcell DZMx
- Laptop or Smart Device
- Ethernet cable if not using Wi-Fi
- Iridium Satellite and Cellular SIM cards
- Tracking and Airtime service provider (please refer to the section on Tracking Providers)

- Use DZMx Connect to Setup
- Hardwired Ethernet Computer Connection
- Wireless Laptop Connection
- Smart Device Connection
- Update Your Firmware
- Before commencing the upgrade
- Using the DZMx USB port
- Using DZMx Connect
- Tracking Configuration
- Configure the DZMx Modems
- Configure the DZMx Tracking Settings
- Advanced Tracking Settings and Integrations
- Registering with a Tracking Provider
- Tracking Providers
- Testing the DZMx
- Troubleshooting
- Access Point Names
Use DZMx Connect to Setup
DZMx Connect is a browser utility that is used to configure and operate the DZMx. It is recommended that DZMx Connect is used to alter DZMx configuration settings, as it is a quicker and more intuitive interface than using the DZMx keypad and display.
Hardwired Ethernet Computer Connection
1. Connect a computer to the DZMx Ethernet port.
2. Power up the DZMx and wait for it to initialise fully.
3. Open a web browser, type in 192.168.4.1 in the address bar and press enter. The home screen of DZMx Connect opens in the browser.
Click here to watch a short video explaining the DZMx Connect capabilities (demonstrated on the app version - discontinued).
WiFi Laptop Connection
1. Power up the DZMx and wait for it to initialise fully.
2. Check that Wi-Fi is enabled. Look for a Wi-Fi icon located at the top right-hand side of the DZMx display. If the Wi-Fi icon is not present, it can be checked and enabled in one of three ways:
a. Press and hold the keypad MODE button until "Enabling Wi-Fi" is displayed on the display. Wi-Fi can also be disabled with a subsequent press of the MODE button.
b. Using the DZMx keypad, navigate to MENU>>Hardware Config>>Wireless and Networks>> Wi-Fi Enable and select Yes.
c. Connect a PC or laptop to the DZMx via an Ethernet cable. Type 192.168.4.1 into a web browser and navigate to Connectivity>> Wi-Fi and toggle the switch to ON.
4. With Wi-Fi enabled on the DZMx, connect your laptop to the DZMx Wi-Fi network.
Default SSID: DZMx Wi-Fi» Default password: flightcell (all lower case)
5. Open a web browser on the laptop and type in 192.168.2.1 then press enter; the home screen of DZMx Connect will open within the browser.

WiFi Smart Device
Connection
1. Configure the smart device to connect to: » Default SSID: DZMx Wi-Fi» Default password: flightcell (all lower case)
2. Open a web browser on the laptop and type in 192.168.2.1 then press enter; the home screen of DZMx Connect will open within the browser.

Update Your Firmware
Flightcell regularly releases firmware upgrades to provide new features and enhancements to existing features and bug fixes. The duration of the upgrade will vary and is dependent on the previous firmware version installed. It will take between 5 and 40 minutes to complete.
Power must be maintained to the DZMx at all times during the complete upgrade process.
A firmware upgrade can be carried out in two ways:
- Using DZMx USB port upgrade method.
- Using DZMx Connect upgrade method.
Before commencing the upgrade:
- Check the current DZMx firmware by going to MENU>Diagnostics Menu>About DZMx. This will show firmware platform 3.x.x or 4.x.x. If the current firmware version is 2.x.x or 1.x.x, please contact the Flightcell technical support team - phone: +64 3 545 8651 or email: tech@flightcell.com.
- Using the USB upgrade method, download the firmware directly from https://www.flightcell.com/support/firmware and save it to a USB memory stick. Using the DZMx Connect upgrade method, download the firmware directly from https://www.flightcell.com/support/firmware and save it to the PC or laptop hard drive.
- Ensure the aircraft is on ground power, or there is enough aircraft battery power to run the DZMx for at least 1 hour (DZMx draws approximately 1A at 28VDC).
To perform the upgrade:
Using the DZMx USB port:
- Insert the USB memory stick into the DZMx USB port.
- Go to MENU>Hardware Config and press ENTER.
- If necessary, enable the DZMx extended menus using Installer Menu Enable, enter the installer password(2468), then press ENTER.
- Scroll down to Firmware Upgrade and press ENTER.
- The upgrade will commence.
- Follow the prompts on the DZMx display.
- Please do not remove the USB stick until the upgrade is complete and the DZMx has restarted.

Using DZMx Connect:
- Connect a laptop or PC to the DZMx via Ethernet or via Wi-Fi.
- Open an internet browser and in the address/URL/location bar, enter the IP address: 192.168.4.1 if on ethernet or 192.168.2.1 if on Wi-Fi.
- Discover the DZMx and log in as an installer using the installer password (2468).
- Select Upgrade and browse to the saved firmware file.
- Select Upload and wait for the firmware file to upload to the DZMx.
- Once the file has been fully uploaded the upgrade process will start automatically.
- After being redirected to the Discovery area, wait for the DZMx to fully reboot before re-discovering it. The display and keyboard may alternatively flash on and off during this period.
- Login as an installer using the installer password.
- Navigate to About and check that the new firmware version is displayed.

Tracking Configuration
Detailed information on DZMx configuration is provided in the Flightcell DZMx Installation Manual. The following are recommended settings to suit most operations. Most settings can be configured on the DZMx control head, but it is faster and easier to do so from a PC/Laptop/Smart Device, using the DZMx Connect app.
To carry out the configuration, you will need to log in to DZMx Connect as an "installer". Please press the "Login" button, select "Installer" and then enter the PIN number: 2468

Configure the DZMx Modems:

Configure as below within DZMx Connect:
Select Settings -> Modem -> Modem 1 (this is typically your Iridium Satellite modem)
- Use For Tracking = Enabled
- Use For Voice = Enabled
- Call Audio Priority = Not used for tracking
- Enable SBD For Tracking = Enabled
- Service Centre Number = Iridium (note that if your Iridium account is with Telstra, Pivotel, DOD or Iridium Russia, you will need to select the appropriate service centre number)

- APN = Access Point Name not required for Iridium Satellite Modem.
- LTE Alternate APN = Alternate Access Point Name not required for Iridium Satellite Modem. This is not related to the tracking features and functions.
- Enable Data = Disabled by default. This enables the DZMx to provide satellite data to connected devices. This is not related to the tracking features and functions.
- Data Roaming = Not required
- Call Forward Number = If using call forwarding, enter the number that you wish calls to this number to be forwarded to. This is not related to the tracking features and functions.
- Call Forward Enable = Use this to enable/disable call forwarding. This is not related to the tracking features and functions.

Select Settings -> Modem -> Modem 2 (this is typically your Cellular modem)
- Use For Tracking = Enabled
- Use For Voice = Enabled
- Call Audio Priority = Not used for tracking
- Enable SBD For Tracking = Enabled
- Service Centre Number = Other (this is not required for cellular modems)

- APN = Access Point Name is essential for the cellular tracking service to operate. You will need to contact your cellular data provider to enquire as to the APN you will be needing to use. Please refer to the end of this guide for details on APN, what they are and why it is important.
- LTE Alternate APN = Alternate Access Point Names are sometimes required depending on your cellular provider. You will need to contact your cellular data provider to enquire as to the APN you will be needing to use.
- Enable Data = Enabled. This enables the DZMx to provide cellular data to connected devices and enables the cellular data functionality within the DZMx. It is critical that this is enabled.
- Data Roaming = Enabled
- Call Forward Number = If using call forwarding, enter the number that you wish calls to this number to be forwarded to. This is not related to the tracking features and functions.
- Call Forward Enable = Use this to enable/disable call forwarding. This is not related to the tracking features and functions.

Select Settings -> Modem -> External (this is only required if you are using a cradle and external Iridium Satellite phone or an external Iridium Modem)
- Use For Tracking = Enabled
- Use For Voice = Enabled
- Call Audio Priority = Not used for tracking
- Enable SBD For Tracking = Enabled
- Service Centre Number = Iridium (note that if your Iridium account is with Telstra, Pivotel, DOD or Iridium Russia, you will need to select the appropriate service centre number)

NB: If you are using a Sat Phone with a cradle as an External Modem to send SBD Tracking Messages, please check the firmware to ensure it is up to date. If it is anything other than v1.0 then you will need to update this.
Configure the DZMx Tracking Settings:

Settings -> Tracking -> General
- Tracking Mode = On
- Lock Tracking Menu = Disabled by default. You can use this to lock and remove the tracking menu from the DZMx menu. It can only be re-enabled through DZMx Connect.
- Aircraft Registration: Enter the Registration/Tail Number of your aircraft.
- HD Tracking Mode = Choose between Off, Cell HD or Full HD. Cell HD tracking enables the DZMx to send GPS position messages every 15 seconds when in cell coverage and at the default rate in satellite coverage. Full HD will send 15 second GPS positions over cellular and 1 minute GPS positions over satellite, with each satellite message containing 4 GPS positions. This may affect your satellite service costs.
- Mark Long Button Press = Choose between "Pos Only" or "Pos with Text Msg". The "Pos With Text Msg" feature will mark the GPS coordinates and allow you to send a canned message with the marked position information.

Settings -> Tracking -> Periodic
- HD Timer (Seconds) = 15
- Periodic Timer (Mins) = 2 mins is recommended but please set it to whichever works for your operation. This is how often the DZMx will send tracking messages when in flight and not in HD mode.
- On Ground Timer (Mins) = 2 mins is recommended but please set it to whichever works for your operation. This is how often the DZMx will send tracking messages when it detects it is on the ground and not in HD mode.

- Taxiing Timer (Mins) = 2 mins is recommended but please set it to whichever works for your operation. This is how often the DZMx will send tracking messages when it detects it is taxiing.
- Heading Timer (Mins) = 1 min is recommended but please set it to whichever works for your operation. This setting is related to the "Heading Variation" setting. If your heading changes by more than your set variation since your last periodic tracking message it will send a "course change" message at this frequency. This needs to be set at a shorter interval than your periodic timer.
- Heading Variation = 20 degrees is recommended but please set it to whichever works for your operation. This setting is related to the "Heading Timer" setting.

- Hover = Enabled. Rotary applications only.
If the DZMx detects that your engines are on, the collective is up, you are in-flight and your speed is dropping below 5kts it will send a Hover start message. If the DZMx detects that your engines are on, the collective is up, you are in-flight, and your speed is raising above 10kts it will send a Hover stop message. If hover is enabled, you will always get the start/stop hover messages. - Suspend Periodic Timeout (mins) = 5
Periodic suspend is a message sent by a tracking provider to the DZMx, indicating when the aircraft is being tracked over ADS-B and the periodic tracking from the DZMx is not required and temporarily suspended. The tracking provider must keep sending the 'suspend tracking' messages at a shorter interval than the timeout time. After 'suspend periodic timeout' time, the DZMx will automatically switch periodic tracking back on again. All other 'event' messages (such as landing/take-off), and distress/alert messages, will still be transmitted while periodic tracking is suspended.

Settings -> Tracking -> Triggered
- Take-off Speed = Speed in Knots. The speed at which your fixed-wing aircraft takes off. This will trigger a Take-Off message.
- Landing Speed = Speed in Knots. The speed at which your fixed-wing aircraft lands. This will trigger a Landed message.
- Power Notification = Enabled. This will trigger the DZMx to send Start-up and Shutdown events. These events include helpful information including firmware version and airframe total time.

Settings -> Tracking -> Geofence
The Geofence application allows operators to suspend tracking while the aircraft remains within a set geographical radius. This enables position reports to be suppressed while the aircraft is operating in a localised area, e.g. during crop dusting or airwork operations.
Moving outside the geofence perimeter will cause geofence mode to be cancelled and normal tracking to resume. Whilst within the perimeter, periodic tracking is suspended and depending on how the geofence suspend mode is configured, triggered events, such as take-offs and landings, can also be suspended.
- Geofence Mode:
- Disabled to disable the Geofence application. This will remove the geofence function from the MENU key.
- Without Events mode to suspend all tracking messages, except emergency, forms, ETM1000 and manual mark messages.
- With Events mode to suspend periodic and course change tracking messages as above, but all triggered events will still be transmitted.
- Events on Cell Only mode to operate as per With Events mode but with the additional cost-saving feature to only send event messages via cellular. Triggered event messages will be queued if the cell modem has no signal until the cell modem obtains a connection to the cell network, or the aircraft flies out of the geofence perimeter.
- Geofence Radius (NM): This is the radius of the geofence in Nautical Miles.

Settings -> Tracking -> Queue
- Queue Size = 20. This is how many GPS position messages the unit will hold and store if the device is experiencing connectivity problems or lack of satellite coverage.
- Queue Type = Send Oldest First
- Restore Unsent Messages = Enabled

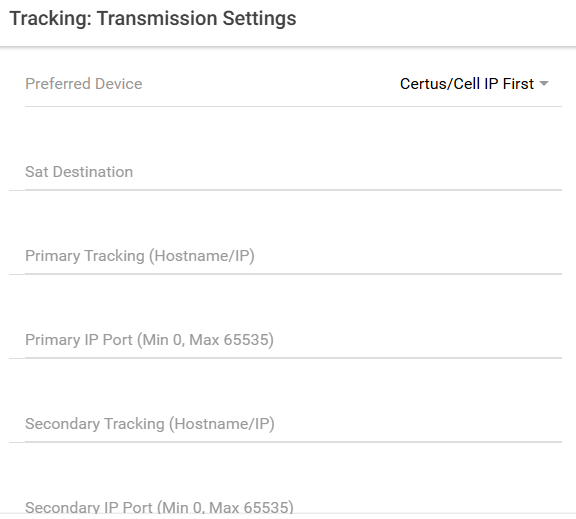
Settings -> Tracking -> Transmission
- Preferred Device = Certus/Cell IP First
- Sat Destination = Email address provided by your tracking provider for sending Iridium SMS position messages. When on a satellite phone call the Iridium modem cannot use Iridium SBD to send your GPS position messages so will switch over to using Iridium SMS.
- Primary IP Address = This is the IP address of the server with your tracking provider that receives your tracking messages. Your tracking provider will provide this IP address or check the end of this guide for the list.
- Primary IP Port = This is the IP port of the server with your tracking provider that receives your tracking messages. Your tracking provider will provide this IP Port or check the end of this guide for the list.
- Secondary IP Address/IP Port = This is the IP address and port of a secondary backup tracking provider. This can be used for backup or debug purposes. Note: this destination does not receive any message acknowledgements, so the DZMx will not report an error if messages do not get delivered to this destination.
- IP Timeout Profile = Medium
- SBD Message Size = Minimum or Maximum
- Tracking Uses PDOP = Enabled/Disabled. You will need to check if your tracking provider supports or requires PDOP. The default is disabled.

Settings -> Tracking -> Automated Remote Monitoring
Some of our tracking providers support this powerful feature. This feature allows the pilot to request and disable automated remote monitoring by the tracking service. To set it up please check with your tracking provider and enable the below settings:
- ARM Enabled = Enabled
- Alert Mode Enabled = Enabled

Settings -> Tracking -> Flight Monitor
Your DZMx can detect and trigger alerts for in-flight exceedances. Please tune these exceedance alert levels carefully as to not trigger false events, but to give you enhanced safety and reporting capabilities. All values should be set specifically for your airframe and typical flying conditions.
- Report Vertical Ascent Exceedances = Enabled
- Report G Force Exceedances = Enabled
- Report Turn Exceedances = Enabled
- Report Pitch Exceedances = Enabled

- Ascent Exceedance Threshold Ft per Min = Set the minimum ascent rate that will trigger an exceedance event.
- Descent Exceedance Threshold Ft per Min = Set the minimum descent rate that will trigger an exceedance event.
- G Force Exceedance Threshold G = Set the minimum G's that will trigger an exceedance event.
- Roll Exceedance Threshold Deg = Set the minimum degrees of roll that will trigger an exceedance event.
- Roll Rate Exceedance Threshold Deg per Sec = Set the minimum degrees of roll rate per second that will trigger an exceedance event.

- Pitch Up Exceedance Threshold Deg = Set the minimum degrees of pitch up that will trigger an exceedance event.
- Pitch Down Exceedance Threshold Deg = Set the minimum degrees of pitch down that will trigger an exceedance event.
- Report Email Address = Enter the email address of where or who you would like the exceedance reports to go.
- Report via Email = Enabled/Disabled. Whether to send the exceedance emails to the address in the above setting.
- Report to Track Provider = Enabled/Disabled. Whether to send the exceedance events, data, and alerts to your tracking provider.

Advanced Tracking Settings and Integrations:
Your DZMx offers the ability to integrate with many onboard sensors and offers specialised applications to suit different aviation operations and needs. These are often specialised or custom to your specific equipment on board the aircraft or your operations and require advanced configuration. Please consult the DZMx Installation Manual for detailed instructions or contact our support team at tech@flightcell.com
Airline
The Flightcell DZMx regional airline solution improves service and turnaround time by automatically sending real-time aircraft operational data (OOOI) along with manifest and cargo information. Voice and data are transmitted over satellite when in the air and cellular when on the ground. Handover between cellular and satellite is seamless for tracking which provides significant cost savings when compared to satellite-only transmission. Read more about this integration here.
AKV
Engine monitoring, recording and cycle counting is now available with Flightcell DZMx in partnership with AKV Inc's ETM1000 engine data acquisition unit. Together they provide legacy operators with a highly effective and affordable means of monitoring engine parameters, exceedances, cycle counts and trends. Read more about this integration here.
Fire
The Flightcell DZMx firefighting solution is fully compliant, allowing operators to meet United States, Canadian and Australian Automated Flight Forwarding (AFF) requirements. It has a built-in ATU and multiple onboard inputs and tank/bucket sensors, providing aircraft performance data to give you the edge. Read more about this integration here.
Load
This is a licensed feature that measures the weight of lifted items e.g. logs. It is similar to the firefighting app where it uses a calibrated load cell to measure and display weights. The user can view the load information that includes the existing load, the total number of loads lifted and the total aggregate weight. Reports can be sent as an event to a tracking provider and to a configured email address. Loads can be manually reported or automatically triggered by pickups and drops.
Ag System
The Flightcell DZMx agriculture solution provides for automatic and real-time reporting of key events along with position information. This data is taken automatically from a combination of onboard information and external wireless feeds from loaders. Read more about this integration here.
Registering with a Tracking Provider
When registering your DZMx with a tracking provider, they will require a few details about your DZMx and your aircraft. You will want to make sure you provide these to them before you wish to test the device and service.
- Aircraft Registration/Tail Number:
- Aircraft Make:
- Aircraft Model:
- DZMx Serial Number: You can find this in the DZMx Diagnostics Menu on the DZMx itself or in the "About" menu in DZMx Connect.
- DZMx Sat IMEI: You can find this in the DZMx Diagnostics Menu on the DZMx itself or on the sticker on the back of the DZMx.
- Iridium SIM card Number: This will be printed on your Iridium SIM card.
Tracking Providers
As an unlocked and tracking agnostic device, DZMx offers the greatest range of options for GPS tracking and mapping solution providers. You are not locked in and can change providers if, and when you want to. We also integrate with several classified military and private mapping service providers. If you have a requirement for this, please contact us.
Airbox Systems
Cell IP Address: 54.201.121.109Cell IP Port: 60020
BlueSky Network - Skyrouter
Cell IP Address: msg.skyrouter.comCell IP Port: 9325
- Guardian Mobility - Silvereye
Cell IP Address: 199.246.25.53
Cell IP Port: 9150
- Network Innovations – NI Track
Cell IP Address: 66.165.183.84
Cell IP Port: 4821
Cell IP Port: 10800
- SkyNet Aviation
Cell IP Address: iridiumdata.skynetmobile.com
Cell IP Port: 31181
- SkyTrac
Cell IP Address: 3.96.81.247
Cell IP Port: 8888
- Spidertracks
Cell IP Address: dzm.spidertracks.io
Cell IP Port: 11011
- TracPlus
Cell IP Address: flightcell.inbound.tracplus.com
Cell IP Port: 11011
- V2 Track
Cell IP Address: service.v2track.com
Cell IP Port: 411
Testing the DZMx
We recommend that all installers contact the aircraft operators tracking provider to ensure correct configuration, transmission options and a sign-off test. This will involve following the below steps with support from your tracking provider.
Phone Calling Test
- Make cell call - press cell (B) and dial number (as if on a cell phone) then ENTER.
- Make sat call - press sat (A) and dial number using 00 as the international dialing prefix (e.g 00 x xxx xxx xxxx) then ENTER.
- Make a phone call to the DZMx cell number and confirm the phone rings in the headset, answer the phone, hang up.
- Make a phone call to the DZMx sat number and confirm the phone rings in the headset, answer the phone, and hang up.
Tracking Test
- Press MARK (1). The aircraft's current position will be shown on your tracking provider's software.
- Press and hold EMER (3). The DZMx will go into emergency mode and will transmit emergency messages every 60 seconds. Monitor the DZMx screen for progress and confirm receipt of messages at your tracking provider's software.
- Press and hold EMER (3) to cancel. The DZMx will go out of emergency mode and will transmit an 'Emergency Cancel' message. Monitor the DZMx screen for progress and confirm receipt of messages at your tracking providers software.
Access Point Names
An Access Point Name (APN) is the name of a gateway between a GSM, GPRS, 3G, 4G, LTE or 5G mobile network and another computer network, frequently the public Internet. A mobile device or your DZMx making a data connection must be configured with an APN to present to the mobile carrier.
As per the cellular modem setup instructions, you will need to add the APN of your cellular service provider to enable the use of the cellular data features of the DZMx.
To find the correct APN from your cellular service provider, you will need to contact them directly. There are also resources on the internet that provide the APNs of many common cellular carriers in the US, Canada, the UK and Australia, you can find one here.
Typical New Zealand and Australian APN
For NZ based customers, your APN is as follows (case sensitive):
- Cellular provider is Spark : APN = internet
- Cellular provider is Vodafone: APN = Vodafone
For Australian based customers, your APN is as follows (case sensitive):
- Cellular provider is Telstra : APN = telstra.iph or telstra.wap
- Cellular provider is Vodafone: APN = live.vodafone.com
For USA based customers, the most common APNs are as follows:
- Cellular Provider is AT&T : APN = NXTGENPHONE
- Cellular Provider is FirstNET : APN = FirstNet-phone