The network monitoring feature enables your Flightcell DZMx to log and transmit metrics on your network connectivity and speeds of data transmission.
This tool is purely used for fault finding and network optimization in regards to using cellular data through your DZMx and its LAN and Wi-Fi capabilities.
You may be requested by the Flightcell Support team to disable or enable this feature, to assist with any optimizations or network troubleshooting. To access and adjust this feature, please follow the instructions below.
Use DZMx Connect to Setup
DZMx Connect is a browser utility that is used to configure and operate the DZMx. It is recommended that DZMx Connect is used to alter DZMx configuration settings, as it is a quicker and more intuitive interface than using the DZMx keypad and display.
Hardwired Ethernet Computer Connection
1. Connect a computer to the DZMx Ethernet port.
2. Power up the DZMx and wait for it to initialise fully.
3. Open a web browser, type in 192.168.4.1 in the address bar and press enter. The home screen of DZMx Connect opens in the browser.
WiFi Laptop Connection
1. Power up the DZMx and wait for it to initialise fully.
2. Check that Wi-Fi is enabled. Look for a Wi-Fi icon located at the top right-hand side of the DZMx display. If the Wi-Fi icon is not present, it can be checked and enabled in one of three ways:
a. Press and hold the keypad MODE button until "Enabling Wi-Fi" is displayed on the display. Wi-Fi can also be disabled with a subsequent press of the MODE button.
b. Using the DZMx keypad, navigate to: MENU>>Hardware Config>>Wireless and Networks>> Wi-Fi Enable and select Yes.
c. Connect a PC or laptop to the DZMx via an Ethernet cable. Type 192.168.4.1 into a web browser and navigate to Connectivity>> Wi-Fi and toggle the switch to ON.
4. With Wi-Fi enabled on the DZMx, connect your laptop to the DZMx Wi-Fi network.
Default SSID: DZMx Wi-Fi» Default password: flightcell (all lower case)
5. Open a web browser on the laptop and type in 192.168.2.1 then press enter; the home screen of DZMx Connect will open within the browser.

WiFi Smart Device Connection
1. Configure the smart device to connect to: » Default SSID: DZMx Wi-Fi» Default password: flightcell (all lower case)
2. Open a browser and enter the IP address 192.168.2.1. The initial screen is a discovery screen and the DZMx will be discovered automatically. The DISCOVER button is only required if the process needs to be repeated.
3. Click on the discovered DZMx unit to open navigation and settings options.

Login as an Installer
To carry out the configuration, you will need to log in to DZMx Connect as an "installer". Please press the "Login" button, select "Installer" and then enter the PIN number: 2468

The Network Settings Menu
To enable or disable the network monitoring and network speed test, please navigate to Settings -> Network

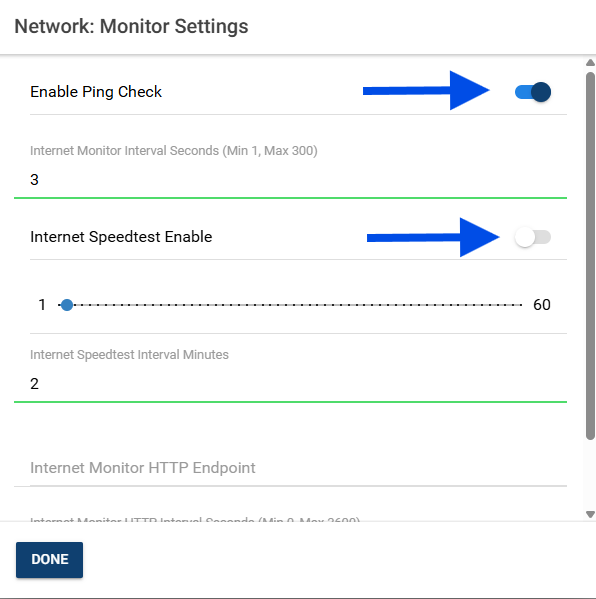
Within the network settings menu you can set enable and disable the Ping check, Speedtest and adjust the frequency or interval of these diagnostic tests being performed. We recommend the below:
- Enable Ping Check: Enable or Disable
- Internet Monitor Interval Seconds: 5
- Internet Speedtest Enable: Enable or Disable (Only enable this as requested or required)
- Internet Speedtest Interval Minutes: 2